
-
Manuals
-
Receipt and storage

-
Before installation
Optional sash removal
Inward opening
-
Installation
General knowledge

Packing - Where?
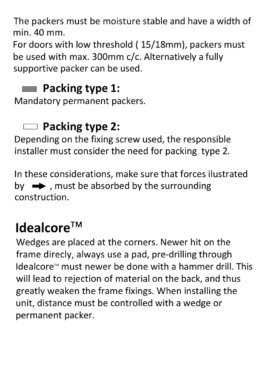
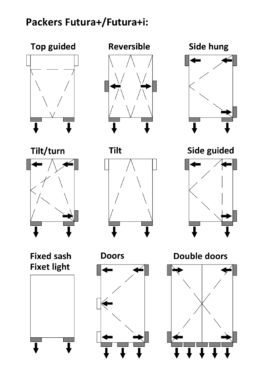
Packing - How?
Tilt/Turn window


Tilt/Turn door
Fixing - Where?

Fixing - How?
Tilt/Turn window


Tilt/Turn door


-
Sealant adhesion
Tilt/Turn window and door

-
After installation
Sash installation
Windows and Doors
Cleaning and lubrication
After installation all drilling dust is removed and locking points are lubricated. This will ensure long lasting trouble free operation.
Weather seals can be rubbed with a silicone stick. -
Function
Turn
Handle operated brake
Movie in the making

-
Adjustment
Roller adjustment
The mushroom bolts can be adjusted to maintain the correct pressure on the frame.
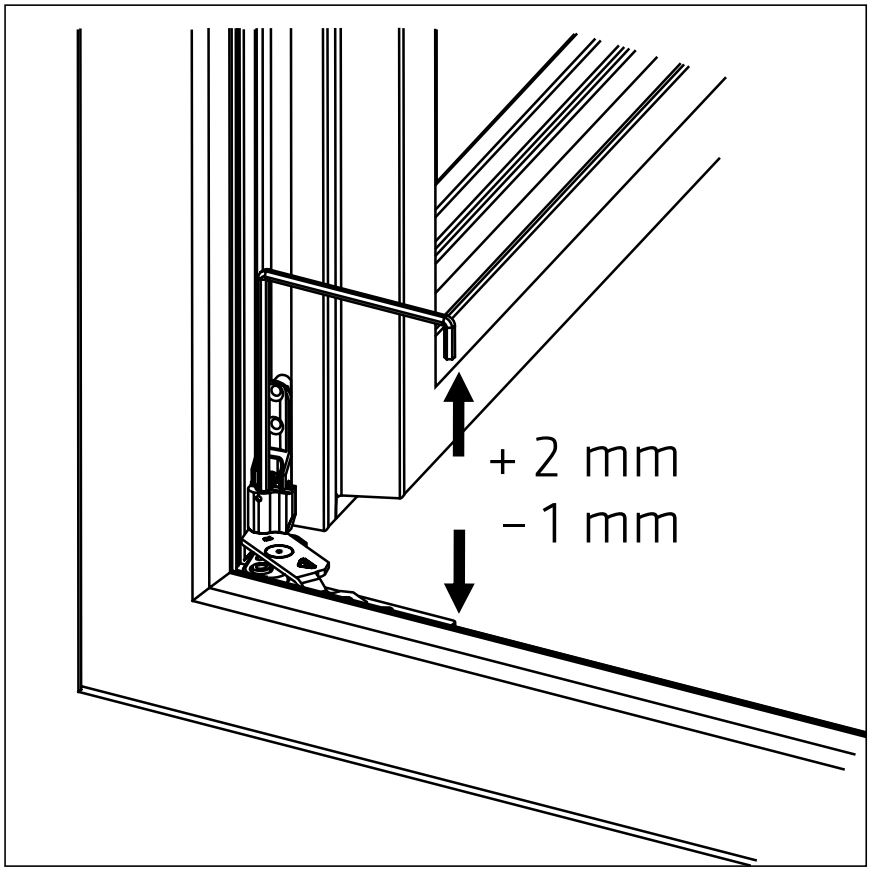
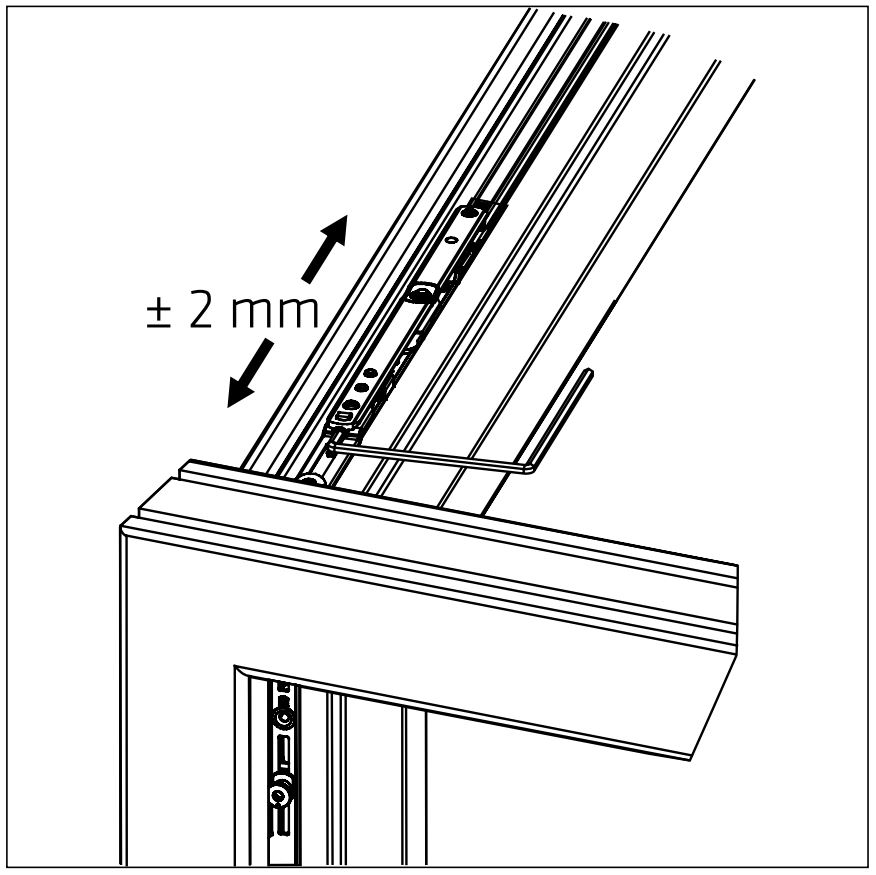
Height adjustment
Inward opening
The sash rests on a pin at the bottom of the hinged side, allowing vertical adjustment.
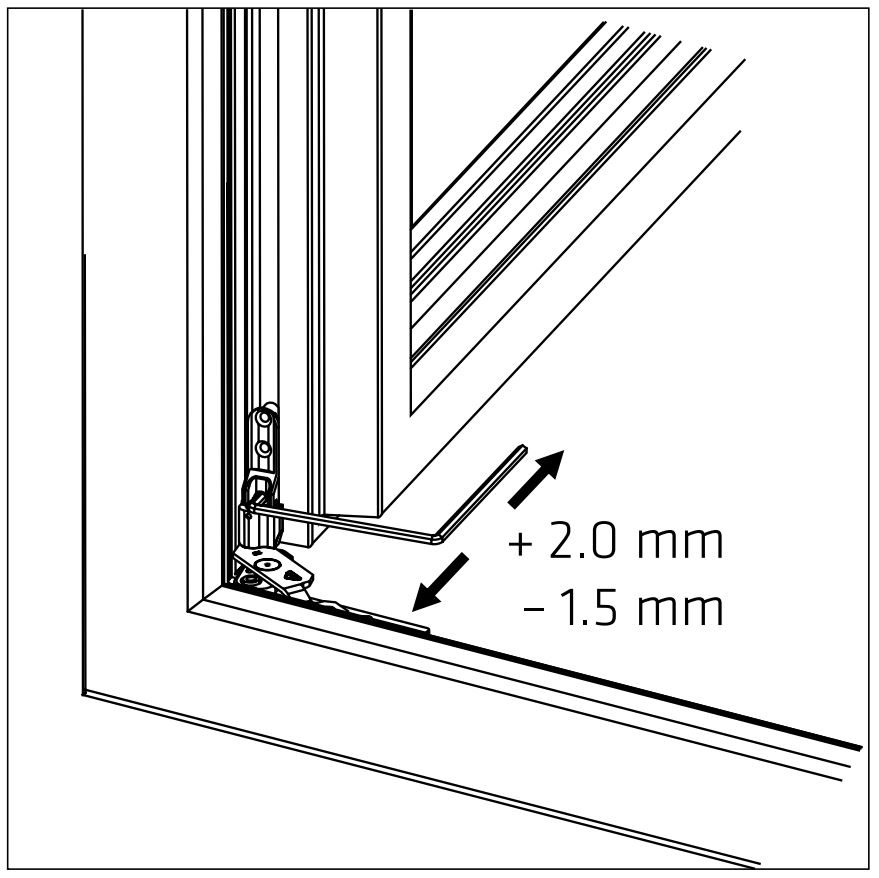
Lateral Displacement
Inward opening
The sash rests on a pin at the bottom of the hinged side, allowing horizontal adjustment of the sash. The sash is guided by levers in the frame head, allowing horizontal adjustment of the sash.
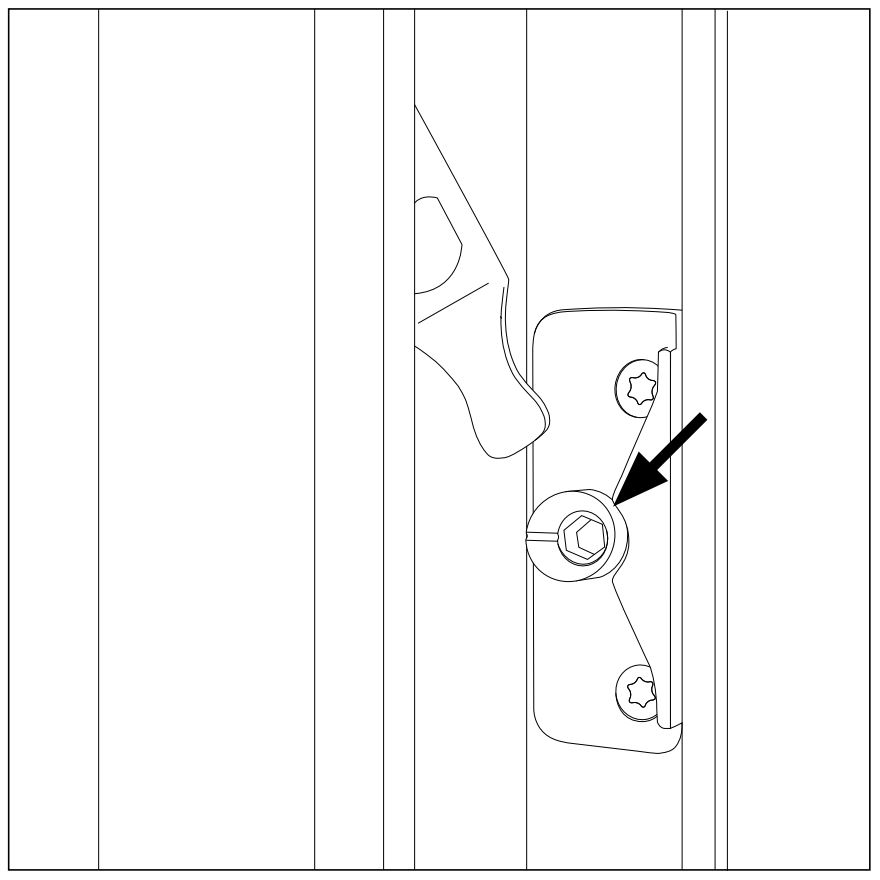
Sash lifter
When closed, the sash is held up by a sash support. The sash support can be adjusted to avoid the sash from dropping.
-
Glass replacement
Replacing glass pane
REMEMBER TO ORDER NEW GLAZING BEADS – THE OLD GLAZING BEADS CANNOT BE REUSED!
-
Maintenance, cleaning and lubrication
Aluminium surfaces
General aluminium surface maintenance
The outer aluminium sash and frame surfaces are affected by the surrounding environment such as city and industrial areas with high traffic intensity and air pollution and coastal areas with salty air which soil and affect the surface more than clean country air.
Cleaning should be done on a regular basis and at least twice a year, maybe in connection with window cleaning. Wash sash and frame surfaces in lukewarm water with a neutral cleaning fluid such as car shampoo and wipe surfaces and edges with a cloth.
Powder coated surfaces
The external aluminium profiles are as standard chrome free and surface treated with a polyester powder coating. This treatment offers a very strong and weather-resistant surface requiring only limited maintenance. In practice, this means cleaning it a couple of times a year with a soft brush or cloth and lukewarm water with a neutral cleaning fluid such as car shampoo.
Minor damage to the surface treatment will not affect the element’s durability since a natural oxide film quickly forms on exposed aluminium, preventing corrosion and white rust attacks.
However, for cosmetic reasons it may be desirable to repair such damage and Idealcombi’s Technical Department would be happy to provide advice and guidance. Call us on 01582 860 940.
Anodised aluminium surfaces
The outer aluminium covering on our products in timber|aluminium can alternatively be supplied with anodic treatment. Once the aluprofiles have been chemically prepared and cleaned thoroughly, they undergo an electrolytic process. Direct current is applied to the profiles which become anodised, thus turning the surface metal into oxide. This process continues until the desired film thickness has been achieved.
An anodised surface treatment provides excellent corrosion resistance in most environments while keeping the surface very smooth and dirt repellent. On top of that it has the ability to preserve what we call a “new” appearance.
Anodised alu-profiles are almost maintenance-free provided that the surface is cleaned a couple of times a year with a soft brush or cloth and lukewarm water with a neutral cleaning fluid such as car shampoo.
Ironmongery
General ironmongery maintenance
It is important to lubricate and maintain all ironmongery to ensure easy operation and function of Idealcombi’s windows and doors, this is also a requirement to maintain the product guarantee.
For lubrication, use an acid-free lubricant followed by an acid-free spray grease. Lubrication can be made with an oil can, a syringe or a spray can with a thin pipe. For further advice on lubrication, please call Idealcombi’s Service Department on tel. 01582 860 940.
Lubrication and maintenance frequency depend on the use and the effect weather conditions, pollution, etc. have on the ironmongery.
We know from experience that ironmongery used in for instance city and industrial areas, areas with high traffic intensity and coastal areas with salty air should be lubricated and maintained more often than ironmongery in a less harsh environment.
Generally, all moveable parts on hinges and closing/locking ironmongery should be lubricated as required, however, at least once a year.
Hinges
Hinges should be lubricated in all joints during repeated activation, so that the lubricant reaches the movable arms.
The joints should be lubricated on the outside and in the crack between the arms. Use an easily penetrating acid-free oil followed by a long-lasting acid-free grease in spray form.Hinges with a sliding track
Hinges should be lubricated in all joints during repeated activation, so that the lubricant reaches the movable arms.
The joints should be lubricated on the outside and in the crack between the arms.Sliding surfaces, hinge sliders and sliding blocks should be maintained in a clean state to facilitate sliding.
IMPORTENT!
The sliding surfaces in the sliding rails are lubricated with Berner PTFE oil or equivalent along the entire length the rails.Espagnolettes
Should be lubricated in all moving parts, lock boxes and by bolts and keeps while activating the mechanism continuously, to ensure the lubricant penetrates in between all moving parts.
Friction brake
Should not normally be lubricated. The tracks should always be kept clean.
Rubber seals
General rubber seal maintenance
During the annual maintenance service, cleaning and lubricating ironmongery, weatherstrips and glazing gaskets should be inspected.
Weather strips
Our weatherstrips are made from EPDM rubbers and several of them in a combination with a solid foot and a soft cellular sealing surface.
The weatherstrips do not require any special maintenance but should be kept clean and free of dirt. This is done by wiping them off once a year with lukewarm water and a neutral cleaning fluid using a cloth. We recommend brushing the weatherstrips with a silicone stick to minimize friction during operation.
Also check that the weather strips are positioned and secured correctly and that they have maintained their sealing function.All weatherstrips are loosely fitted in a perimeter groove making them easy to remove and install on most element types if they are damaged and need replacement – or in connection with surface treatment maintenance.
Never paint weatherstrips or brush them with wood preservatives/oils.Glazing gasket
Glazing gaskets are made of EPDM/cell rubbers and doe not require any special maintenance but should be kept clean and free of dirt. This is done by wiping them off once a year with lukewarm water and a neutral cleaning fluid using a cloth.
-
Accessories
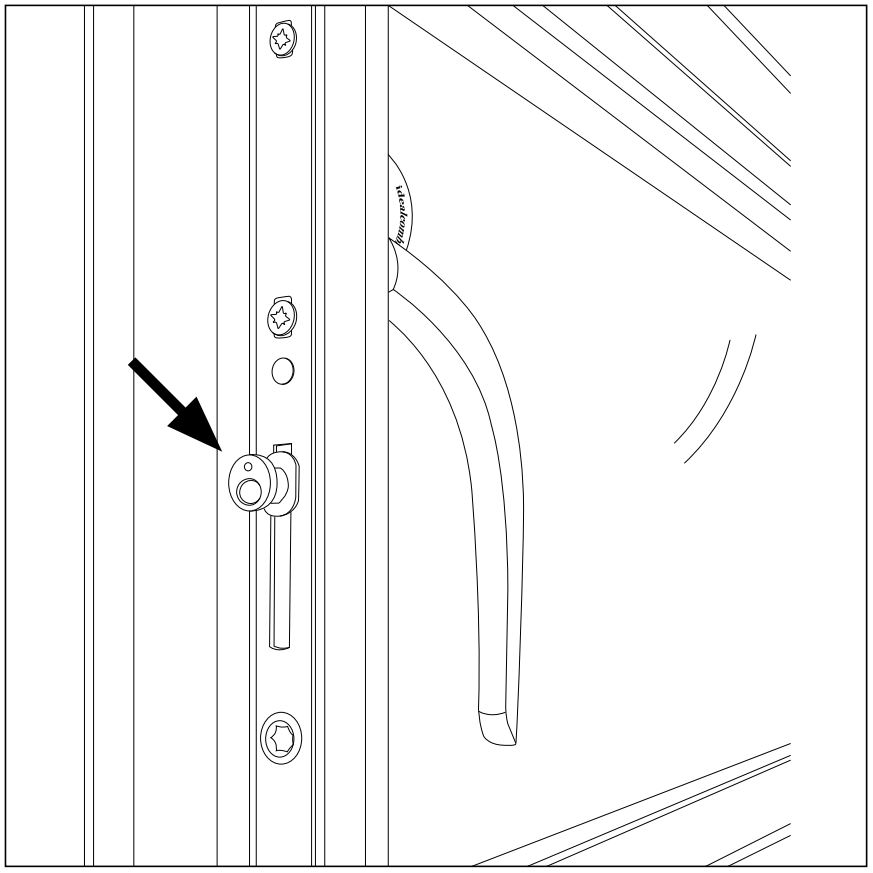
Locking cylinder
-